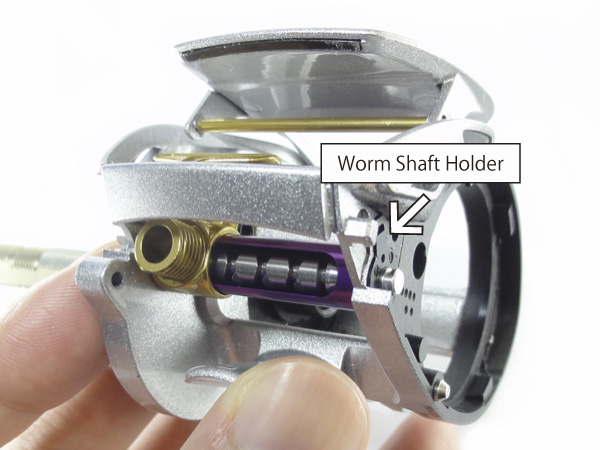
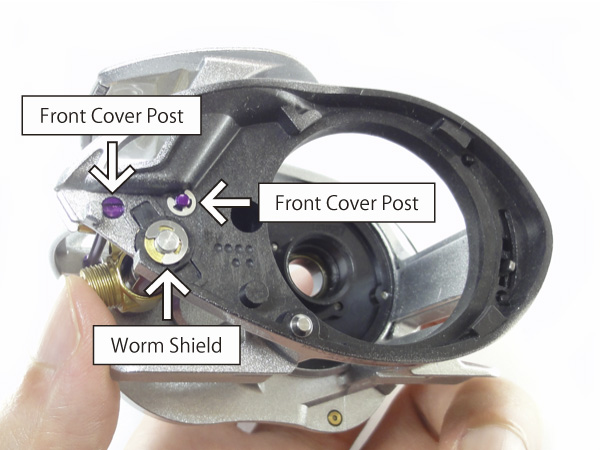
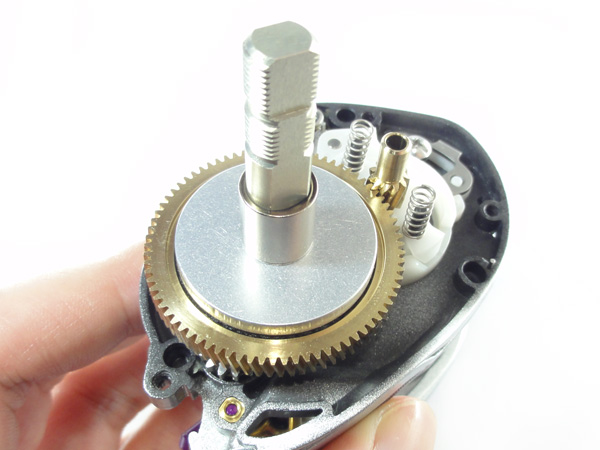
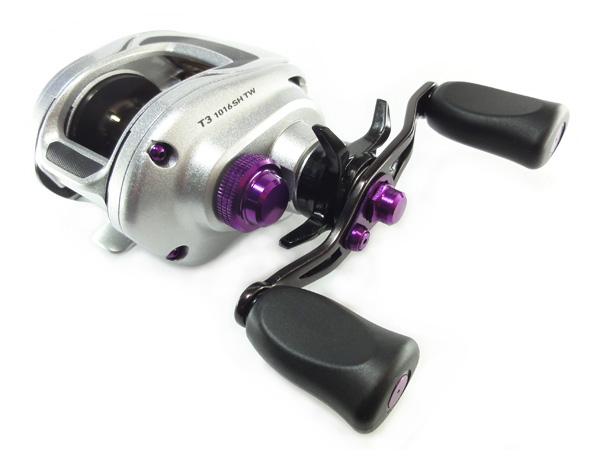
[DAIWA] Front Cover Post 【T3】 SAPPHIRE BLUE
|
| Beginner's Guide |
 |
 |
 |
| Genuine Parts, Spool |
 |
 |
| Product Search by Manufacturer |
| Product Search by Parts | ||||
 |
||||
| Spinning Reel | ||||
| Bearing | ||||
 |
Bearing Upgrade Kit | |||
 |
All Size Bearing | |||
 |
Line Roller Genuine/Custom |
|||
 |
Various parts for line rollers | |||
 |
Spool Shaft Drag System |
|||
| Color Parts | ||||
  |
Handle Cap and Reel Stand | |||
| Spool | ||||
 |
SHIMANO Genuine |
|||
 |
DAIWA Genuine |
|||
 |
STUDIO Ocean Mark for SHIMANO |
|||
 |
STUDIO Ocean Mark for DAIWA |
|||
 |
TICT for SHIMANO, DAIWA |
|||
 |
SHIMANO Genuine Drag Washer |
|||
 |
DAIWA Genuine Drag Washer |
|||
 |
Custom Parts Drag Washer |
|||
 |
Spool Case | |||
| Handle | ||||
| Special Features by Fishing Style |
||||
 |
Light Game Fishing Handles |
|||
 |
For Big Game Offshore Power Handles |
|||
| Items by Manufacturer | ||||
 |
YUMEYA SHIMANO Genuine |
|||
 |
SLP WORKS DAIWA Genuine |
|||
 |
Avail | |||
 |
ZPI | |||
 |
REVIVE | |||
 |
Studio Composite |
|||
 |
LIVRE | |||
 |
STUDIO Ocean Mark |
|||
 |
DLIVE | |||
 |
34 | |||
 |
ING | |||
 |
TICT | |||
 |
Other Parts | |||
| Cardinal | ||||
 |
Cardinal Parts | |||
 Baitcasting Reel Baitcasting Reel |
||||
| Bearing | ||||
 |
"Kattobi" Spool Bearing Upgrade Kit | |||
 |
All Size Bearing | |||
| Color Parts | ||||
 |
Dressup Color Parts | |||
| Spool | ||||
 |
YUMEYA SHIMANO Genuine |
|||
 |
SLP WORKS DAIWA Genuine |
|||
 |
Avail for SHIMANO |
|||
 |
Avail for AbuGarcia |
|||
 |
Avail for ISUZU, PAGANI |
|||
 |
Avail for tailwalk |
|||
 |
Avail for PFLUEGER |
|||
 |
ZPI for SHIMANO, DAIWA, ALCANCE |
|||
|
Spool Case | |||
| Star Drag | ||||
 |
for SHIMANO | |||
 |
for DAIWA | |||
 |
for AbuGarcia | |||
| Handle | ||||
| Special Features by Fishing Style |
||||
 |
For Big Game Offshore Power Handles |
|||
| Items by Manufacturer | ||||
 |
YUMEYA SHIMANO Genuine |
|||
 |
SLP WORKS DAIWA Genuine |
|||
 |
Avail for SHIMANO |
|||
 |
Avail for DAIWA, Abu |
|||
 |
ZPI | |||
 |
REVIVE | |||
 |
Studio Composite | |||
 |
LIVRE | |||
 |
STUDIO Ocean Mark |
|||
 |
DLIVE | |||
 |
alpha tackle | |||
 |
IOS FACTORY | |||
 |
KAHARA JAPAN |
|||
 |
Haneda Craft | |||
 |
Valleyhill | |||
 |
whiplash factory | |||
 |
engine | |||
 |
RAD SENSE | |||
 |
Gaea | |||
 |
tailwalk | |||
 |
||||
| Baitcating and Spinning | ||||
| Handle Knobs | ||||
| Special Features by Material |
||||
 |
Natural Materials! Wood and Cork Knobs |
|||
| Items by Manufacturer | ||||
 |
YUMEYA SHIMANO Genuine |
|||
 |
SLP WORKS DAIWA Genuine |
|||
 |
HEDGEHOG STUDIO |
|||
 |
Avail | |||
 |
ZPI | |||
 |
Studio Composite | |||
 |
LIVRE | |||
 |
STUDIO Ocean Mark |
|||
 |
IOS FACTORY | |||
|
fishing house freedom | |||
 |
Pletry | |||
 |
mibro | |||
 |
MC SQUARED | |||
 |
Megabass Genuine | |||
 |
whiplash factory | |||
 |
ULUCUS | |||
 |
evometal | |||
 |
||||
| Tools and Other Parts | ||||
| Reel Oil & Grease | ||||
 |
YUMEYA SHIMANO Genuine |
|||
 |
SLP WORKS DAIWA Genuine |
|||
 |
HEDGEHOG STUDIO |
|||
 |
ZPI | |||
 |
IOS FACTORY | |||
 |
I.Works | |||
 |
MC SQUARED | |||
 |
GLITCH OIL | |||
 |
LIVRE | |||
 |
Haneda Craft | |||
 |
Y'Z CRAFT | |||
 |
34 THIRTY FOUR |
|||
 |
STUDIO Ocean Mark |
|||
 |
MTCW | |||
 |
BEST TACKLE | |||
 |
SMITH | |||
| Original Tool | ||||
 |
Spool Bearing Pin Remover | |||
 |
Spool Shaft Pin | |||
 |
Bearing Check Tool | |||
 |
Trust Wrench |
|||
 |
Handle Knob Cap Remover | |||
 |
Bearing Stopper Ring | |||
 |
Adjustment Washer, Shim |
|||
 |
E-ring | |||
 |
Line Roller Remover | |||
 |
Side Cover Plate | |||
 |
Precision Driver | |||
 |
Reel Display Stand | |||
 |
HEDGEHOG STUDIO Sticker |
|||
| Goods & Stickers | ||||
 |
Smart Phone Case | |||
 |
Smart Phone Case (Notebook) | |||
 |
Cous Cous Reel Cover |
|||
 |
Stylish Tin plate |
|||
 |
DECADEWORKS |
|||
 |
BASSERS UNITED | |||
 |
BASS BRIGADE | |||
 |
B-SIDE LABEL | |||
| Boat Parts Ladder | ||||
 |
KAKEDZUKA DESIGN WORKS | |||
| Other Parts | ||||
 |
UZU Collaboration SALTIGA LD |
|||
 |
Original Rod Falcon |
|||
 |
Avail | |||
 |
ZPI | |||
 |
LIVRE | |||
![Photo1: [DAIWA] Front Cover Post 【T3】 SAPPHIRE BLUE](https://www.hedgehog-studio.co.jp/data/hedgehog-studio/product/20141223_4be369.jpg)
|