


 Baitcasting Reel


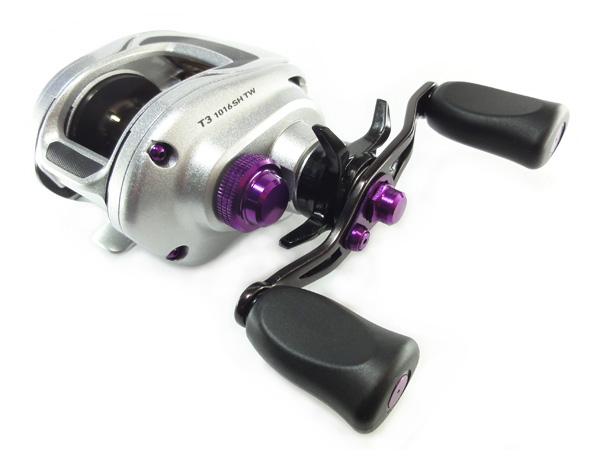
[DAIWA] Worm Shield 【T3】 RED
![Photo1: [DAIWA] Worm Shield 【T3】 RED](https://www.hedgehog-studio.co.jp/data/hedgehog-studio/product/20130322_bf3b7f.jpg)
|Description of the product
※Select it for left or right handle.
|Compatibility
■T3 BALLISTIC T3BLS100H/T3BLS100HL/T3BLS100HS/T3BLS100HSL/T3BLS100XS/T3BLS100XSL
■T3 BALLISTIC XS T3BLS100XSLTD-Y/T3BLS100XSLTD-R
■T3 100H Limited Edition Red/Yellow
■T3 AIR 6.8R-TW/6.8L-TW/8.6R-TW/8.6L-TW
■T3 SV SV6.3R-TW/SV6.3L-TW/SV8.1R-TW/SV8.1L-TW
■T3 1016H-TW/1016HL-TW/1016SH-TW/1016SHL-TW
■T3 MX 1016H/1016HL/1016SH/1016SHL/1016XH/1016XHL
|Attach the parts
We are now going to explain to you how to return all the parts back to your reel once they had been removed.
In the photos below, we have removed all excess grease to aid you in ease of understanding.
**Please do not remove any grease from your reel!!
We will now explain to you how to replace the Level Wind Cap,
Level Wind Post, Front Cover Post & the Worm Shield.
(Our front cover posts may not be used on the T3 air series reels.)
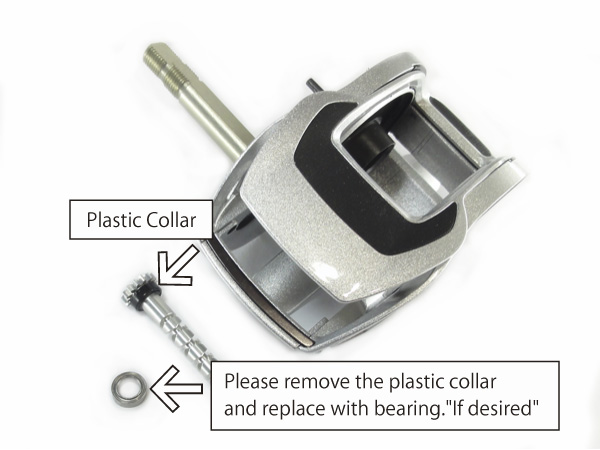
If you wish to change out to the plastic collar for a ball bearing,
you may order that bearing by clicking right here.
↓
SHG-850ZZ
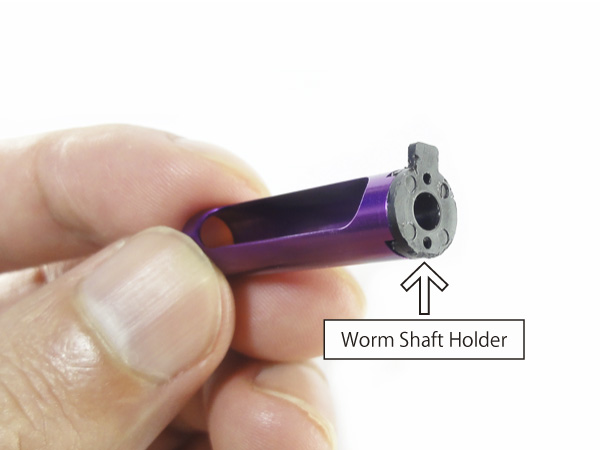
Next, please replace the worm shield onto the worm shaft holder.
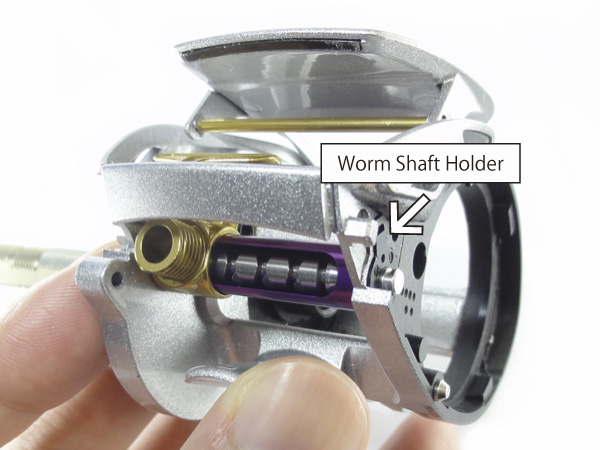
After you have replaced worm shield onto the worm shaft holder,
next, replace the worm shaft gear and worm shield.
Make sure that the worm shaft holder fits snug into its crevice before moving onto the next step.
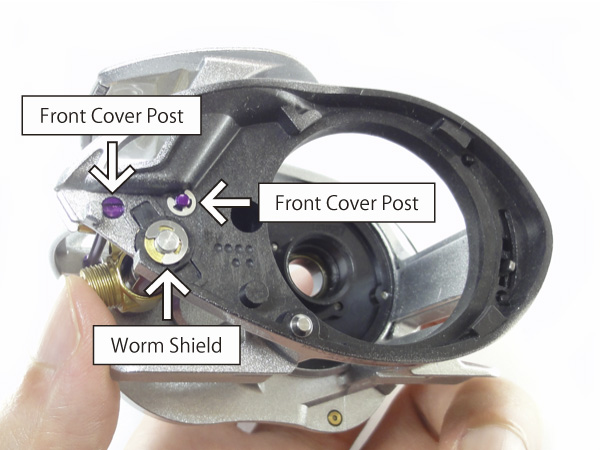
After you have firmly attached the worm shaft holder, please replace the E-Ring.
Next, replace the level wind post and front cover post in that same fashion.
If you have lost any of your E-rings during assembly,you may order new ones.
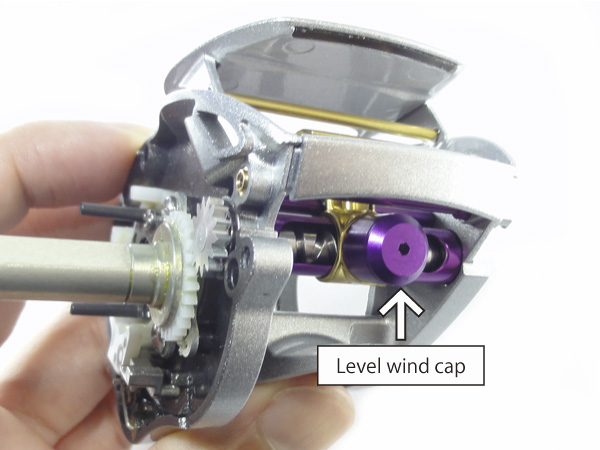
After you have replaced the pole, you may now attach the custom level wind cap.
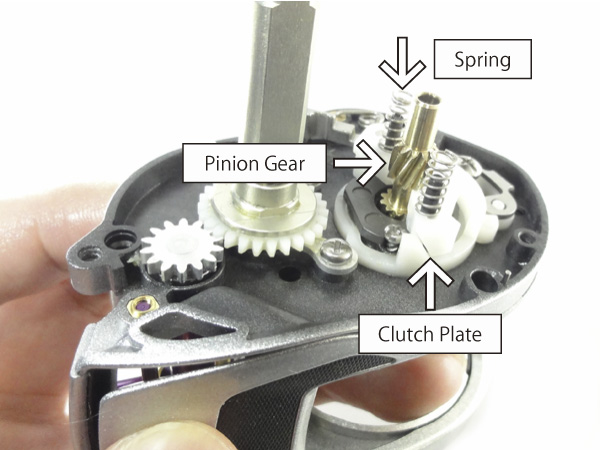
Moving on, next replace the pinion gear and clutch plate spring.
Please pay special attention to the direction that these parts are facing while replacing them.
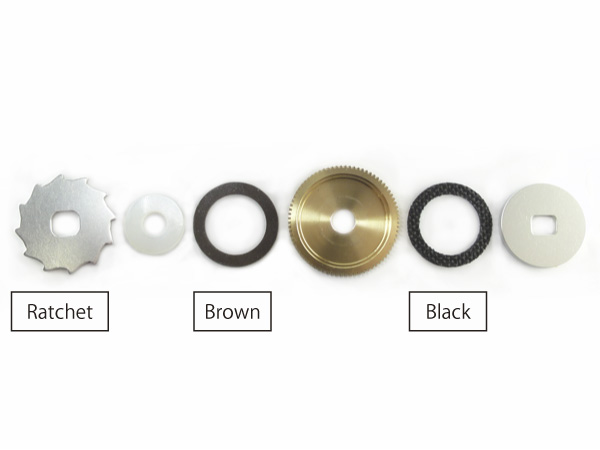
From here on, we will explain how to replace the drive gear.
Please replace the gears back in the order seen in the above
photo. Make sure the ratchet is facing in the proper direction while replacing,
if not, you will not be able to re-engage the clutch after you have dis-engaged it.
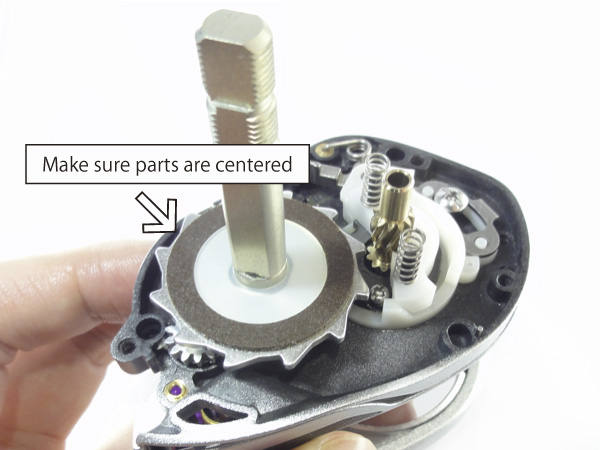
Replace gears in the proper order.
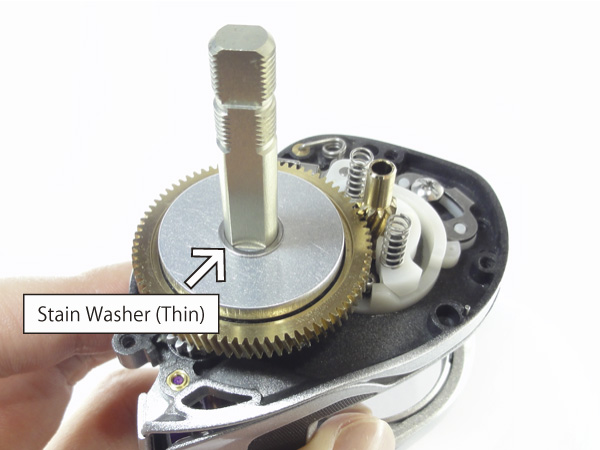
Please place the thin stainless washer on last.
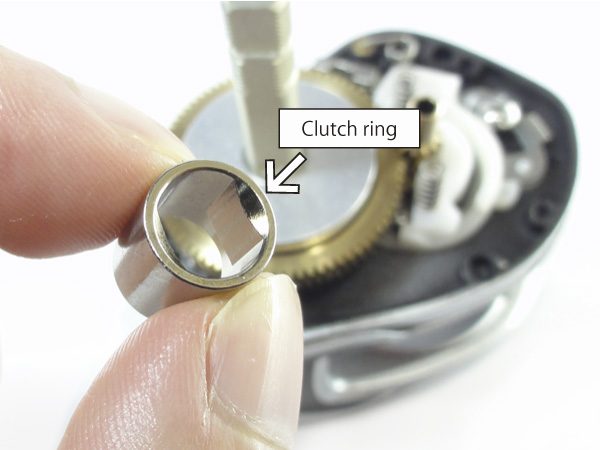
Next please replace the clutch ring.
Replace the clutch ring as shown in the above photo.
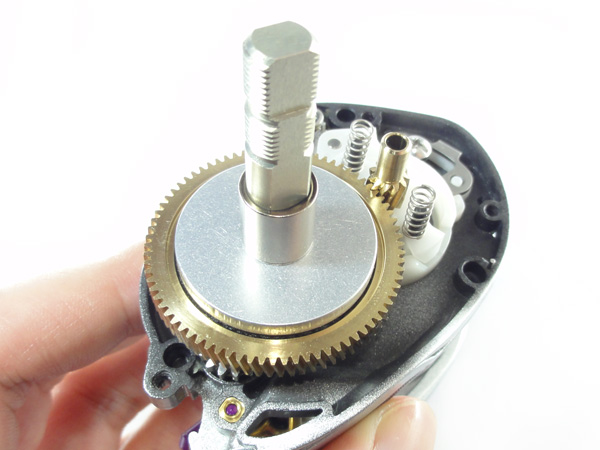
You have now finished replacing all the parts back into the gear box!!
Next, please replace the side cover.
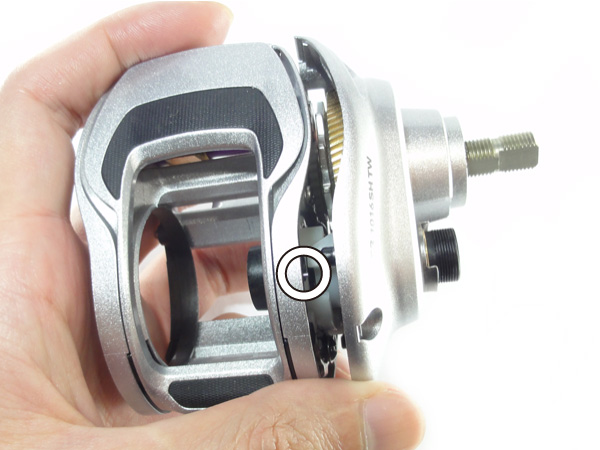
When replacing the side cover,
it is best to follow the "pin" as shown circled in the above photo for a perfect fit.
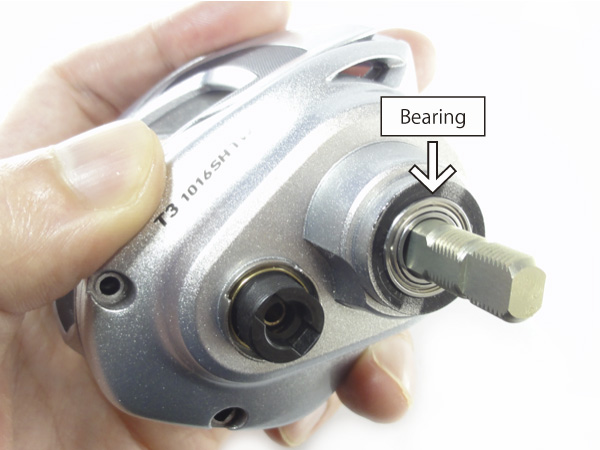
After you have replaced the side cover,
next replace the bearing as shown in the above photo.
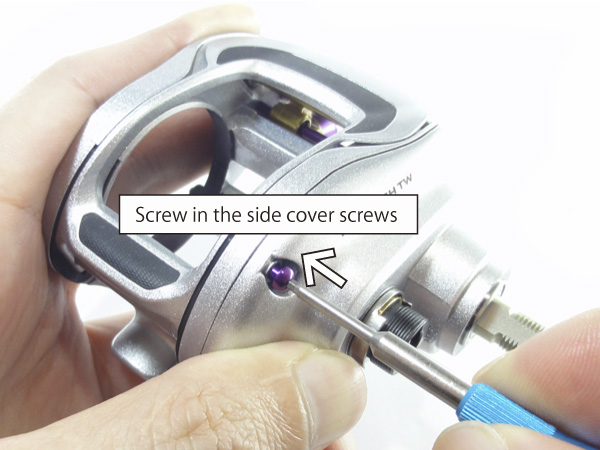
While replacing the carbon screws, please push down on the screw heads firmly,
or else the screw heads will
strip and of course need to be replaced .
Screw in each screw approx 90% of the way first,
and then go back around tightening each screw with an even amount of pressure.
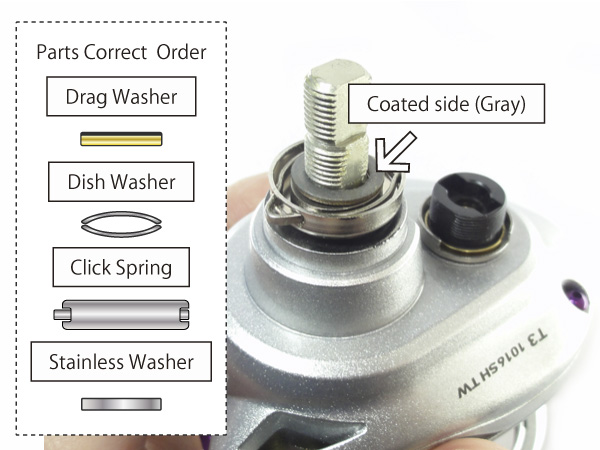
Next we will explain how to replace the star drag knob.
First, replace the drag washer with the coated side facing outwards as shown in the above photo.
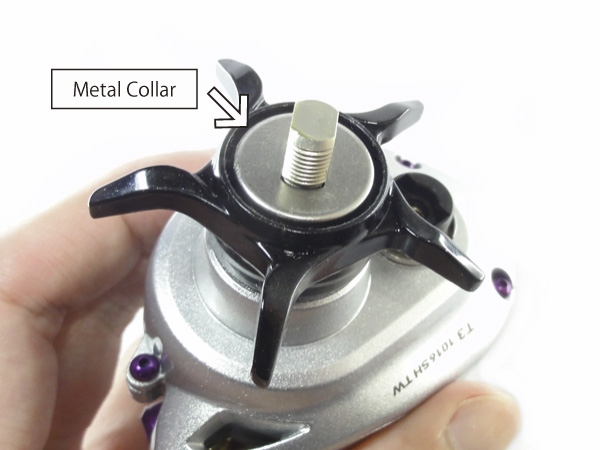
Next, screw back in the star drag and then replace the metal collar as shown in the above photo.
Finally, replace the handle and you will be finished with the assembly!!