
[Abu] Level Wind Cap REV16


Our Selling Price: US$5.90 [Regular Price: US$8.42]
Item Description
| Product Concept

Weight: approx. 1.62g
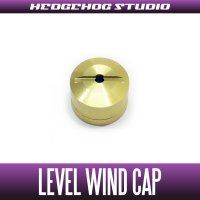
A machined duralumin level wind cap compatible with Revo LTX BF8, Revo SLC IB series and more.
* Can be used for both left and right handles.
| Customization Example


* Parts List
[HEDGEHOG STUDIO] Duralumin Screw Set 5-6-6-8
[HEDGEHOG STUDIO] Level Wind Cap REV16
[HEDGEHOG STUDIO] Line Guide Shaft REV16
[HEDGEHOG STUDIO] Guide Pin REV16
[HEDGEHOG STUDIO] Level Wind Tube REV16
[HEDGEHOG STUDIO] Mechanical Brake Knob LTX
[HEDGEHOG STUDIO] Handle Lock Nut Set M Size
[HEDGEHOG STUDIO] Handle Knob Cap Set L Size Superior
| Compatible Reels
- Revo 2016 and Later Models (LTX-BF8, SLC-IB7/8, ALC-BF7, ALC-IB6/7, etc.)
- Revo LTX
- Revo LTZ
- Revo LTZ Limited 7
- Revo Deez 6
- Revo BLACK 9
- Revo LT
- Revo LT 6
- Revo MGX
- Revo ALT
- Revo Elite 7/8
- Revo Elite IB 5/7/ROCKET9
- Revo Power Crank 5/6
- REVO BIGSHOOTER COMPACT
- REVO BIGSHOOTER
- Revo Elite 2
- Revo Elite IB
- Revo Elite Power Crank
- Revo Elite SX (KTF x ENGINE)
- PRO MAX
- SILVER MAX
- BLACK MAX
- SALTY STAGE Revo MJ
- SALTY STAGE Revo SJ
- SALTY STAGE Revo LJ
- SALTY STAGE Revo BJ
- Revo MGXtreme
- Revo 3 Premier
- Revo 3 Rocket
- Revo 3 Inshore
- Revo 3 Winch
- Revo 3 STX
- Revo 3 SX
- Revo 3 S
- Revo 2 IB
- Revo 2 Premier
- Revo 2 Inshore
- Revo 2 Winch
- Revo 2 STX
| Color Lineup
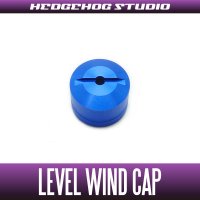 |
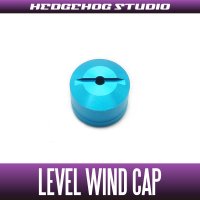 |
 |
| Sapphire Blue |
Sky Blue |
Red |
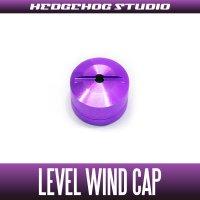 |
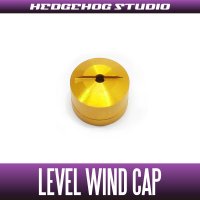 |
 |
| Royal Purple |
Gold |
Champagne Gold |
 |
 |
|
| Black |
Gunmetal |
| How to Install

Remove the side cover and disassemble the reel into the reel body, spool and side cover plate.

Remove the handle lock nut, handle and star drag.


Remove the 4 screws securing the side cover.


After removing the side cover, remove the main gear and pinion gear as shown in the photo. Then remove the 2 screws securing the front cover.

The front cover can now be removed.

Remove the genuine level wind cap using a large flat-head screwdriver.

Remove the E-ring securing the cross gear using a precision flat-head screwdriver.

Once the E-ring is removed, all parts around the level wind can be removed.

Replace the level wind tube.
First, remove the pin indicated by the arrow using tweezers or a similar tool.

The genuine level wind tube can now be taken out. Replace it with the HEDGEHOG STUDIO Level Wind Tube REV16.

After replacing the level wind tube, assembling the parts as shown in the photo first will make the following steps easier.

Install the assembled level wind tube parts and the level wind into the reel body, and secure them again with the E-ring.

Next, replace the line guide shaft.
Replace the genuine line guide shaft removed earlier with the HEDGEHOG STUDIO Line Guide Shaft REV16.
(Install it in the hole on the right side.)


Install the Line Guide Shaft REV16 at the position indicated by the arrow.
The two ends of the line guide shaft have different designs. Insert the end shown enlarged in the photo first.

Next, replace the guide pin.
Replace the genuine guide pin removed earlier with the HEDGEHOG STUDIO Guide Pin REV16.
(Install it in the hole on the left side.)

Install the Guide Pin REV16 at the position indicated by the arrow.
The two ends of the guide pin also have different designs. Insert the end shown enlarged in the photo first.
* The Line Guide Shaft REV16 and the Guide Pin REV16 look the same, but their shaft diameters are different. The thicker one is the Line Guide Shaft REV16 and the thinner one is the Guide Pin REV16.

Finally, replace the level wind cap.
Replace the genuine level wind cap removed earlier with the HEDGEHOG STUDIO Level Wind Cap REV16.

Attach the Level Wind Cap REV16 to the level wind.

Reattach the front cover removed earlier.

Attach the ratchet to the handle shaft.
Make sure the square hole of the ratchet fits firmly onto the base of the handle shaft, and check that the ratchet gear properly pushes up the kick lever when the clutch is disengaged.

Install the main gear, pinion gear, springs, washers and other parts.


Attach the handle-side side cover and install the 4 screws.

Install each part in order as indicated by the arrows.
Install the bent washers so that they face each other.

Install the star drag and washers.

After securing the handle, attach the spool and side cover. Installation is complete once you have confirmed that the spool rotates smoothly, the handle winds smoothly and the clutch switches ON/OFF properly.