
[SHIMANO Genuine] Line Roller for 17 Vanquish FW, 16 Vanquish [10TSK] (1 piece)
![Photo1: [SHIMANO Genuine] Line Roller for 17 Vanquish FW, 16 Vanquish [10TSK] (1 piece) (1)](https://www.hedgehog-studio.co.jp/phone/data/hedgehog-studio/product/20240917_7cc002.jpg)
![Photo2: [SHIMANO Genuine] Line Roller for 17 Vanquish FW, 16 Vanquish [10TSK] (1 piece) (2)](https://www.hedgehog-studio.co.jp/phone/data/hedgehog-studio/product/06191533_5b28a3a85787e.jpg)
![Photo1: [SHIMANO Genuine] Line Roller for 17 Vanquish FW, 16 Vanquish [10TSK] (1 piece) (1)](https://www.hedgehog-studio.co.jp/phone/data/hedgehog-studio/_/70726f647563742f32303234303931375f3763633030322e6a706700313130000074006669745f686569676874.jpg)
![Photo2: [SHIMANO Genuine] Line Roller for 17 Vanquish FW, 16 Vanquish [10TSK] (1 piece) (2)](https://www.hedgehog-studio.co.jp/phone/data/hedgehog-studio/_/70726f647563742f30363139313533335f356232386133613835373837652e6a706700313130000074006669745f686569676874.jpg)
Our Selling Price: US$15.79 [Regular Price: US$22.55]
Item Description
Product Description
SHIMANO Genuine Product
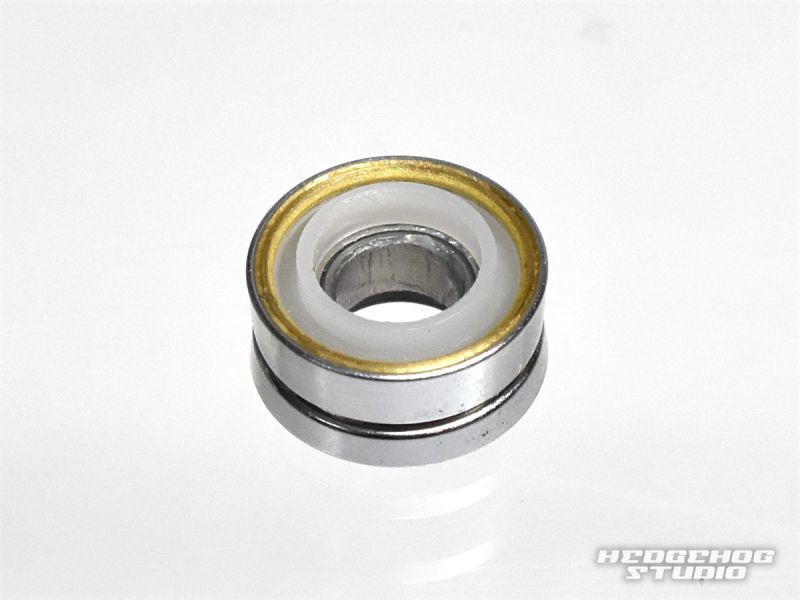
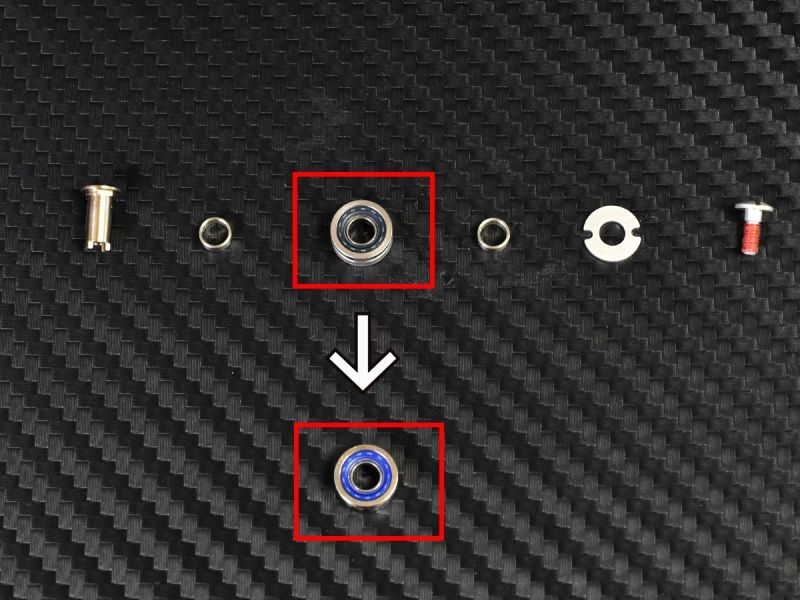
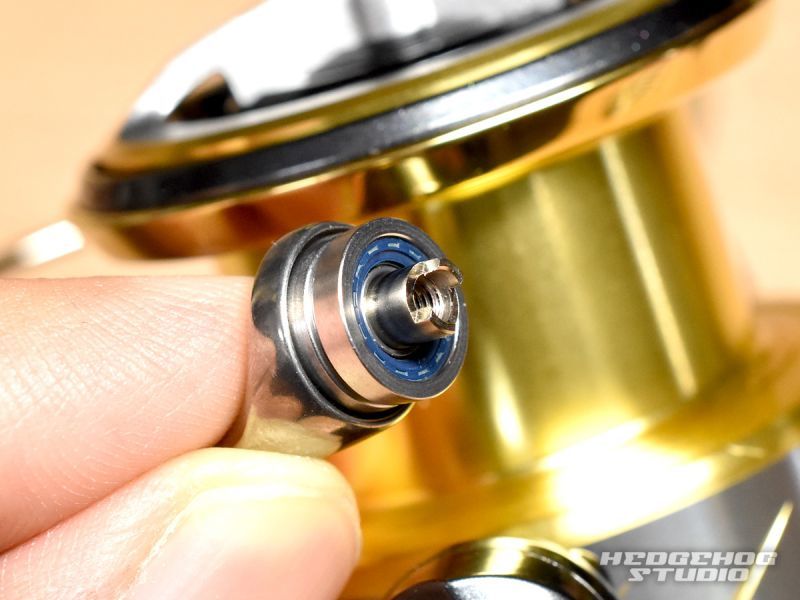
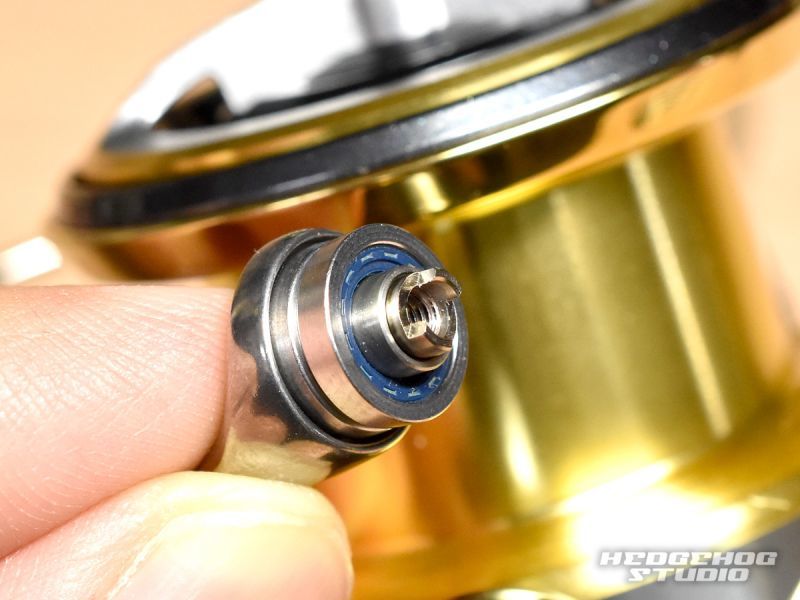
This genuine line roller is installed on the 17 Vanquish FW and 16 Vanquish.
The line roller for the 17 Vanquish FW and 16 Vanquish is integrated with the line roller bearing due to the CoreProtect feature.
Therefore, if the bearing wears out and you wish to replace it, you must replace the entire line roller, as there is no other way.
(*Due to this mechanism, adding additional bearings is impossible.)
Please use this as a spare part when maintaining your line roller.
Quantity: 1 pc.
Compatible Models
- 17 Vanquish FW
(1000S, 1000SHG)
- 16 Vanquish
(1000PGS, C2000S, C2000HGS, C2500HGS, 2500S, 2500HGS, C3000, C3000HG, C3000XG,
C3000SDH, 3000HGM, 4000HG, 4000XG)
Installation Method
Since all genuine line rollers are similar in construction, we will use the 14 STELLA as an example to explain replacing a genuine line roller.
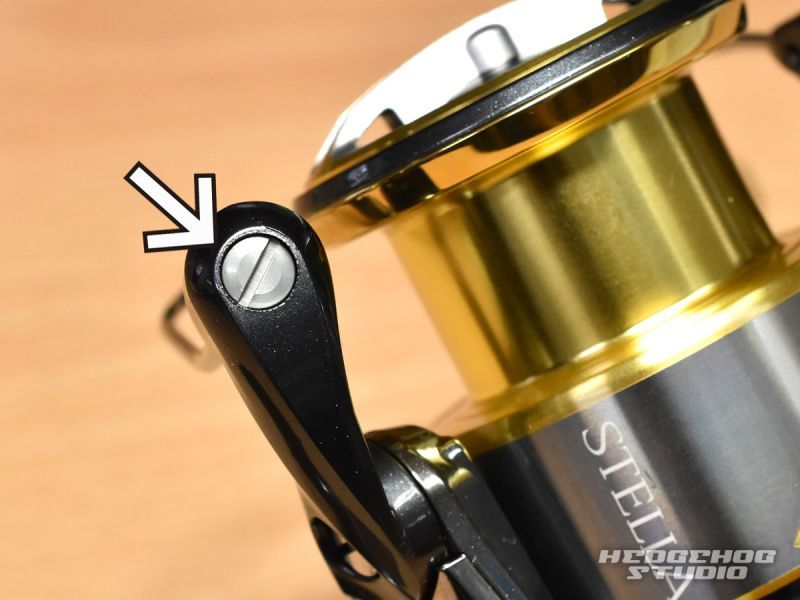
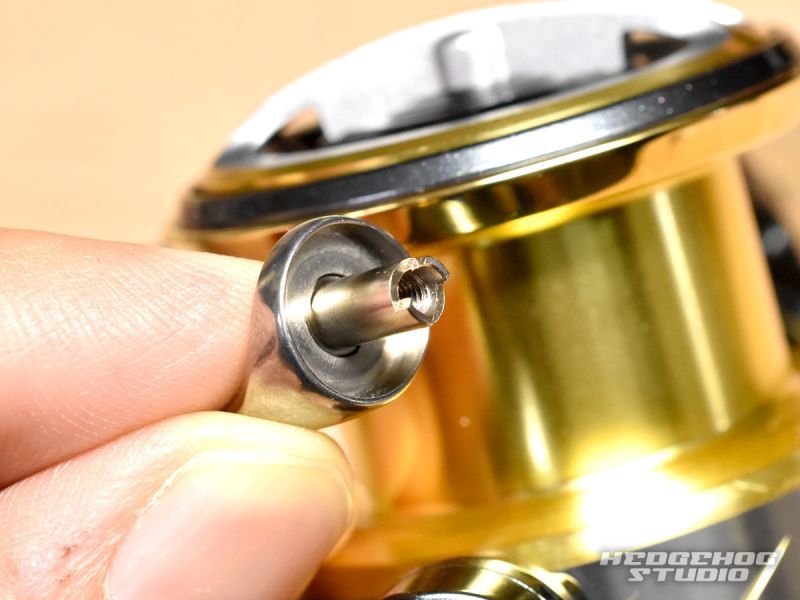
Remove the bolt securing the line roller.
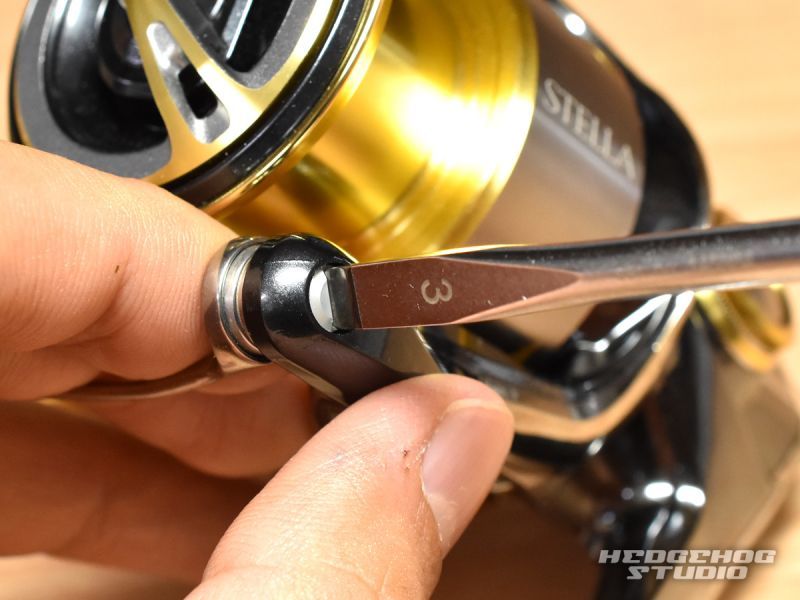
Depending on the condition of the reel, the bolt may be stuck, so be careful not to crush the threads when removing the bolt.
*Caution
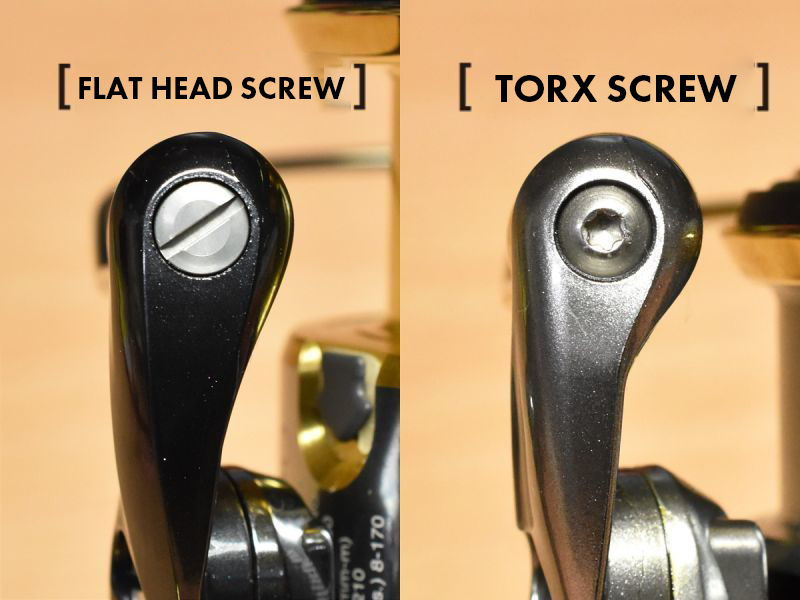
Depending on the reel type, the screw thread may be a flathead screw or a Torx screw. Please prepare a screwdriver suitable for your reel.
When the screws are removed, six parts can be removed.
Replace the line roller with a new one.
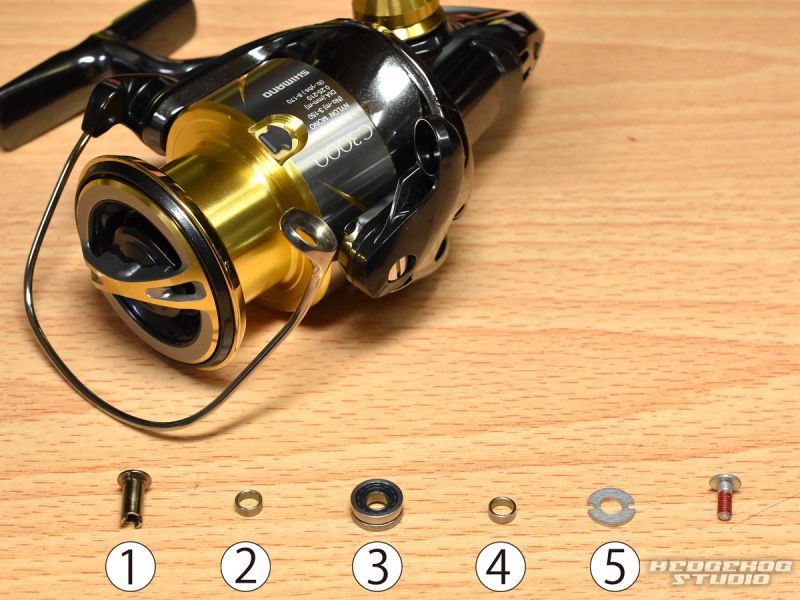
After replacing the line roller with a new one, assemble the parts in the above-numbered order.

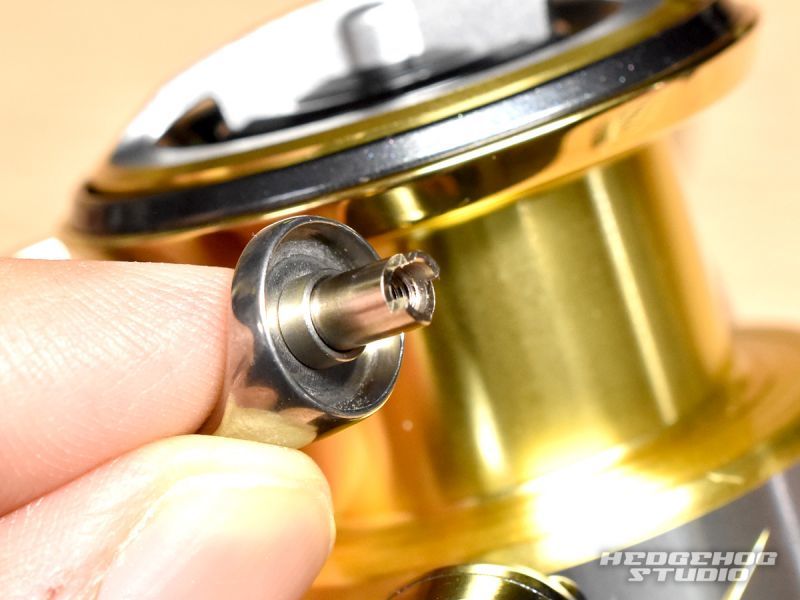
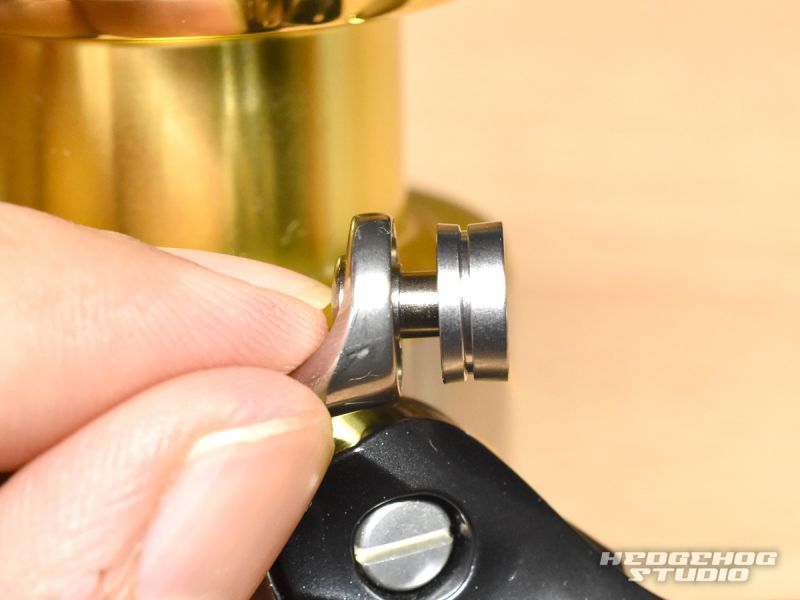
First, install part (1).
This part has an installation orientation, so install it correctly according to its shape.
After installation, keep holding down part (1) with your finger, as shown in the photo, until the work is completed.
If the force is too loose and the part is displaced, it will not be installed correctly.
Attach part (2).
Attach the main unit of the line roller as shown in (3).
*Caution
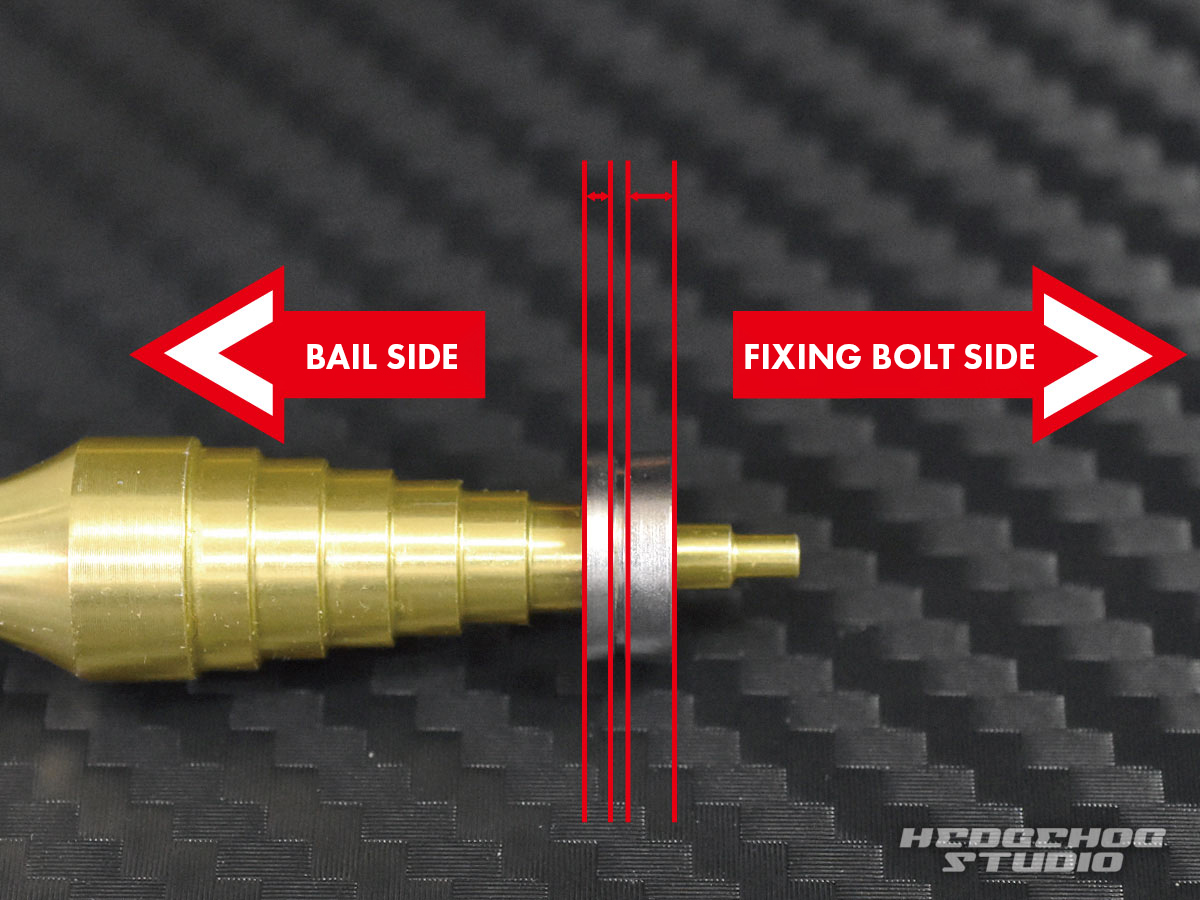
There is an orientation for attaching the line roller.
If you look at the side of the line roller, you will see that the width of the grooves on both sides is different.
The narrower side should face the bail side, and the wider side should face the fixing bolt side.
Attach part (4).
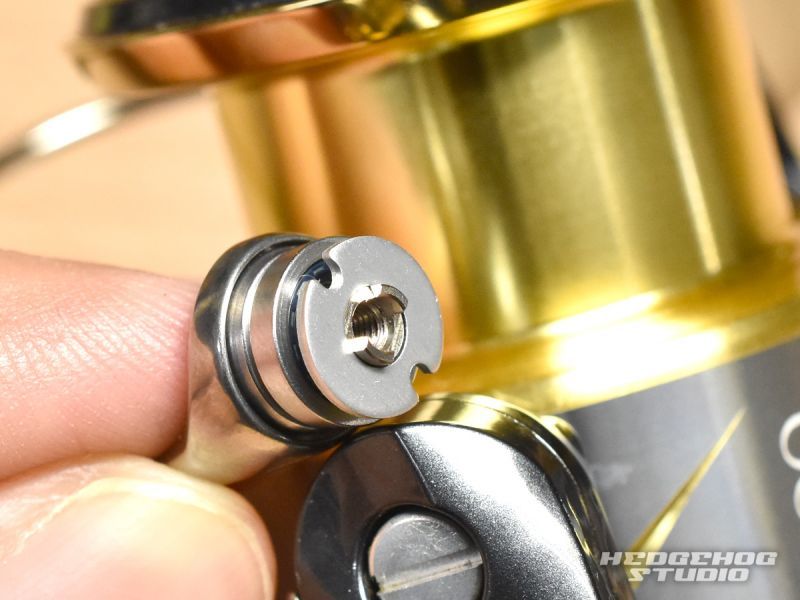
Attach the plate (5).
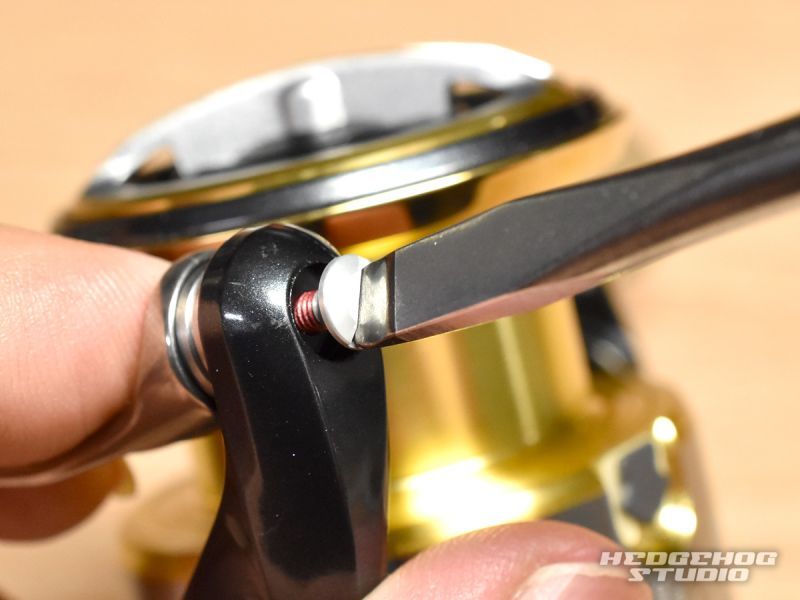
Raise the arm, correctly fit the tip of (1), and fix it with the bolt.
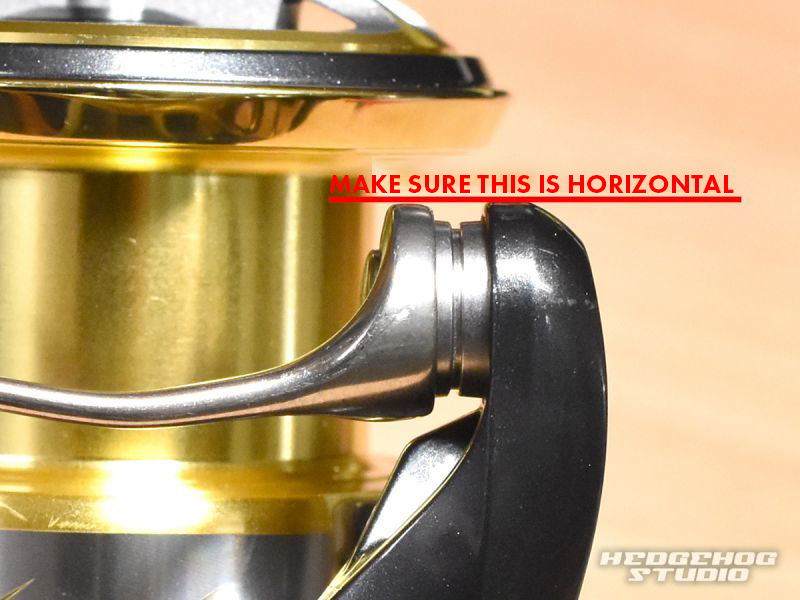
Finally, check that the parts are correctly installed and that the line roller rotates appropriately.
If there are no problems, the work is complete.