
[For SHIMANO] Line Roller 2BB Bearing Upgrade [Ver.2]
(Required Parts)
- Line roller bearing (SHG-740ZZ or HRCB-740ZHi) x2
- Roller bush x2
- Roller washer A (0.2mm: thin type) x3
- Roller washer B (0.8mm: thick type) x1
Smoother line roller rotation reduces line twist, which keeps the line supple and improves durability and casting distance.
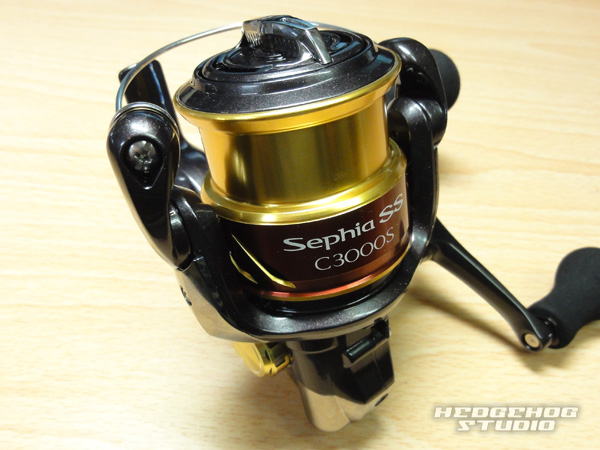
Disassemble the line roller.
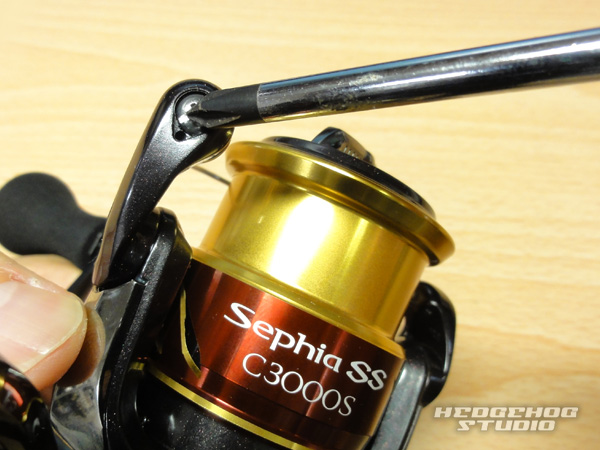
Remove the screw that secures the line roller.
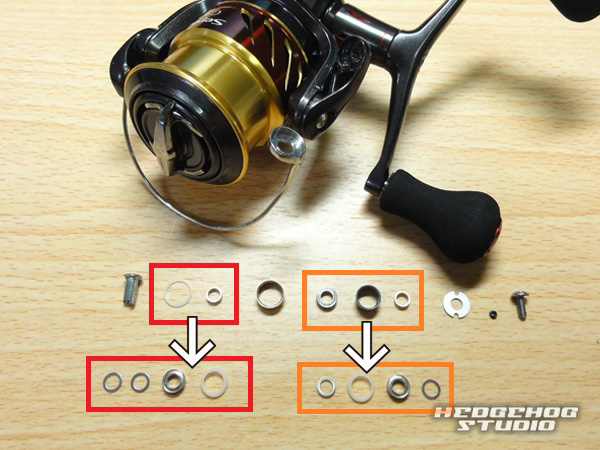
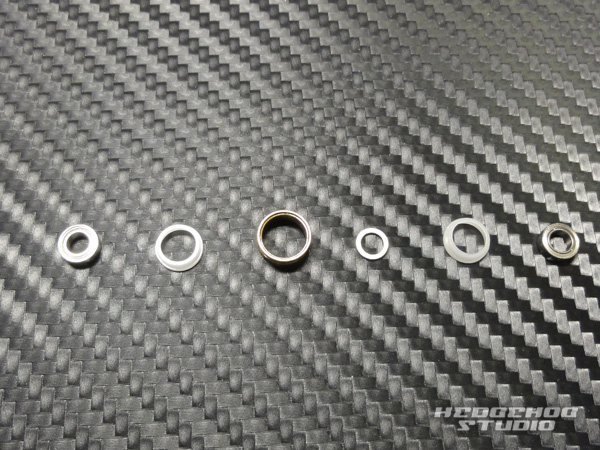
The parts in the top row are the Genuine parts.
Replace each of the outlined parts with the parts included in the 2BB upgrade kit.
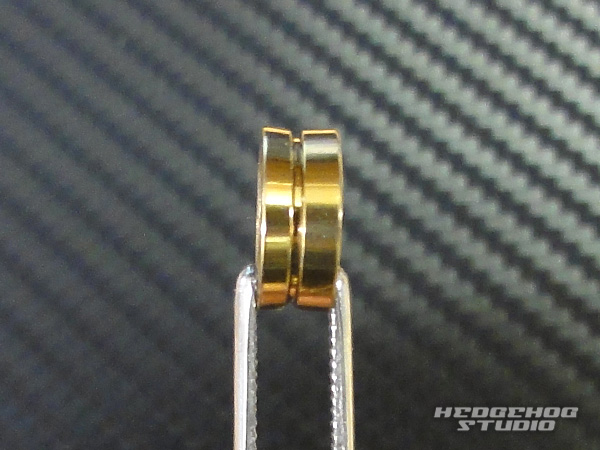
The line roller must be installed in the correct orientation.
Check its original orientation when removing it.
In most cases, the wider side faces the screw head.
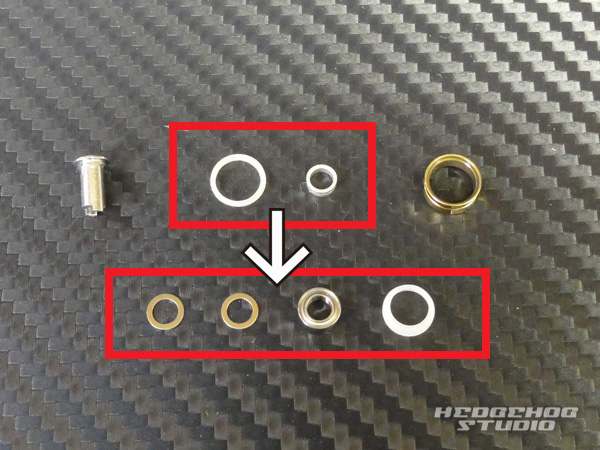
For the left side of the line roller, use the included roller washer A (0.2mm: thin type) x2, bearing x1 and roller bush x1.
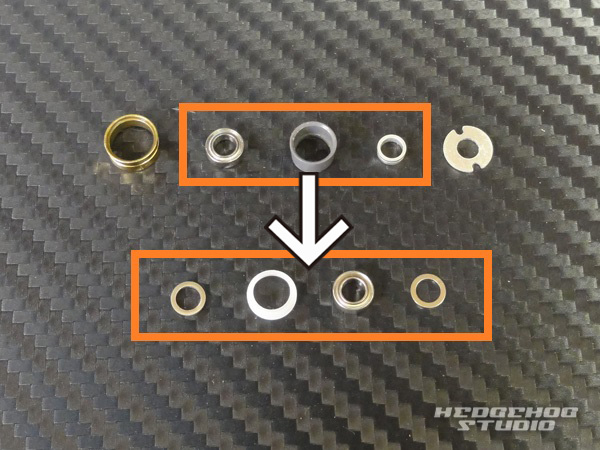
For the right side of the line roller, use the included roller washer B (0.8mm: thick type) x1, roller bush x1, bearing x1 and roller washer A (0.2mm: thin type) x1, together with the line roller holder (Genuine part).
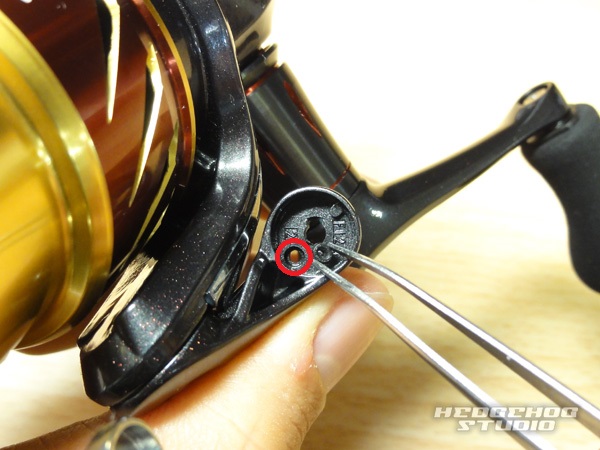
Now install the parts. First, attach the Genuine rubber ring to the arm cam.
This is a very small part, so be careful not to lose it during disassembly and assembly.
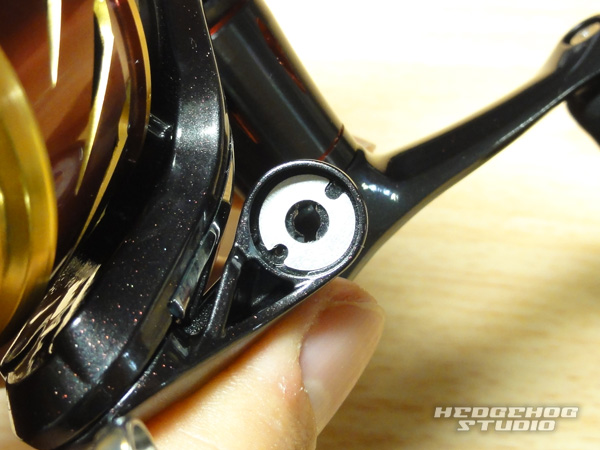
Next, install the Genuine line roller holder.
Make sure this part is fitted in the correct position.
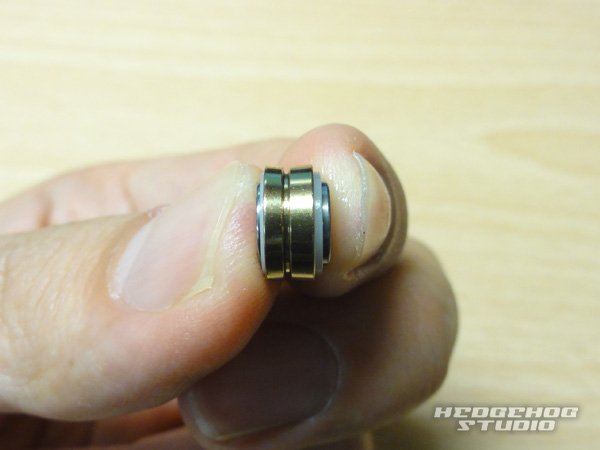
Installing the bearings into the line roller beforehand makes the following steps easier.
From the left, the parts go in this order: bearing, roller bush, line roller body, roller washer B (0.8mm: thick type), roller bush, bearing.
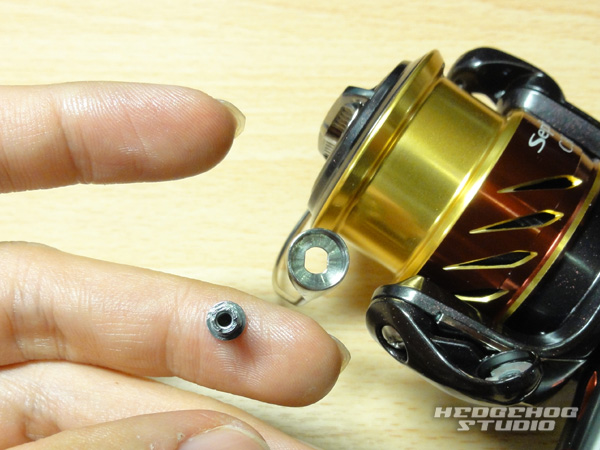
Attach the arm shaft to the arm.
This part must also be fitted in the correct position.
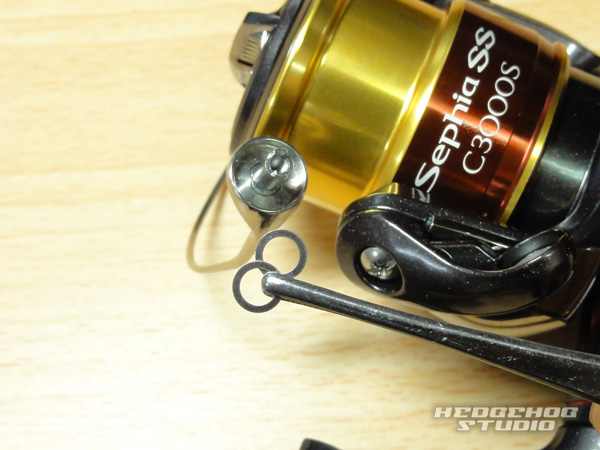
Next, attach two roller washers A (0.2mm: thin type).
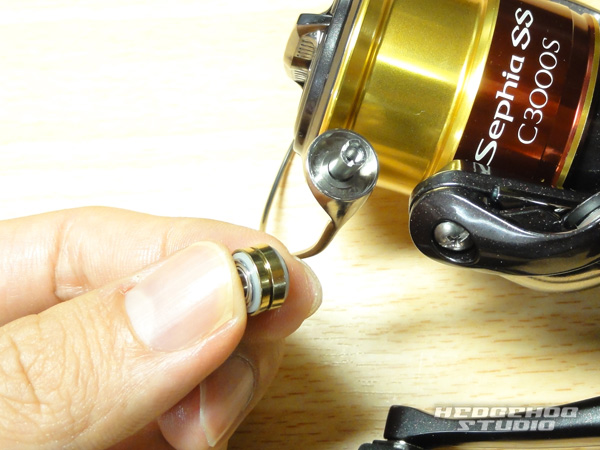
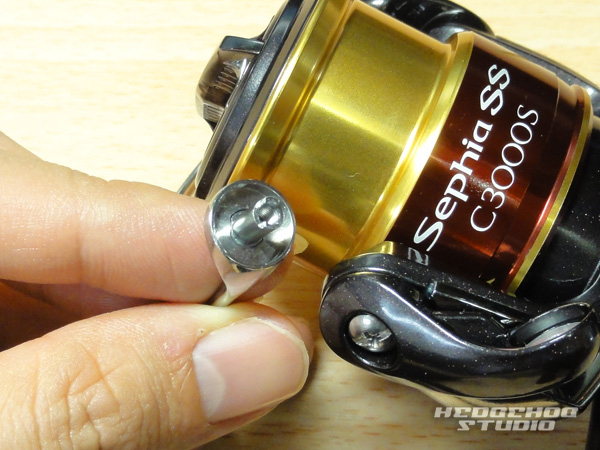
Install the line roller body assembled earlier.
Pay attention to the orientation of the line roller.
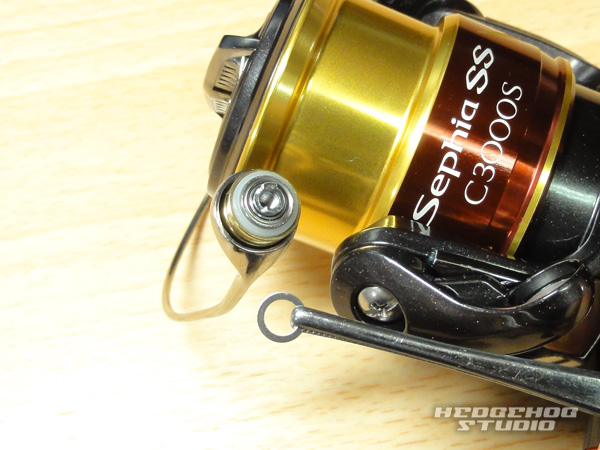
Attach one roller washer A (0.2mm: thin type).
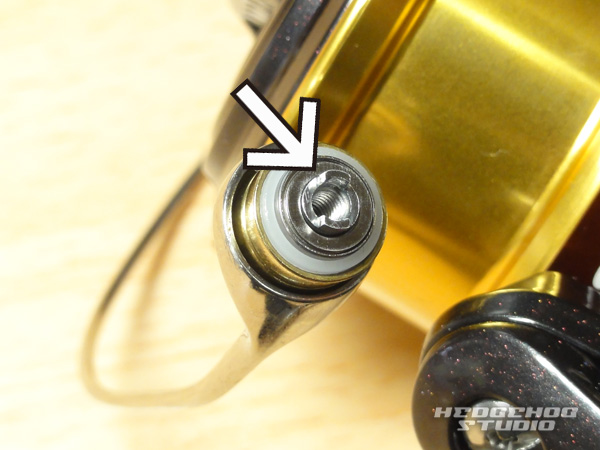
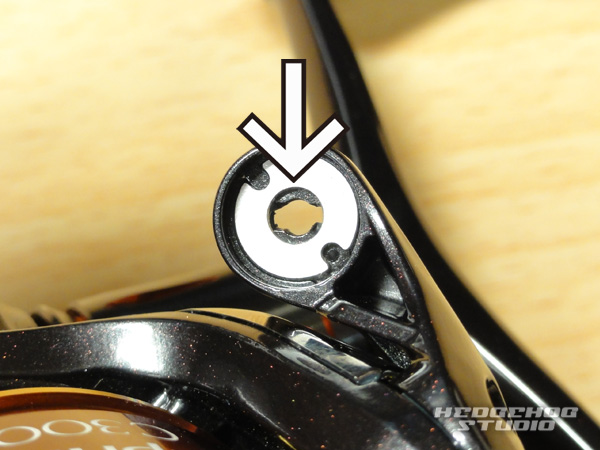
This completes the installation of the parts. Next, return the arm cam to its original position.
The parts must be fitted in the correct position, and the arm cam may snap back forcefully due to spring tension, so always hold it with your finger and return it slowly.
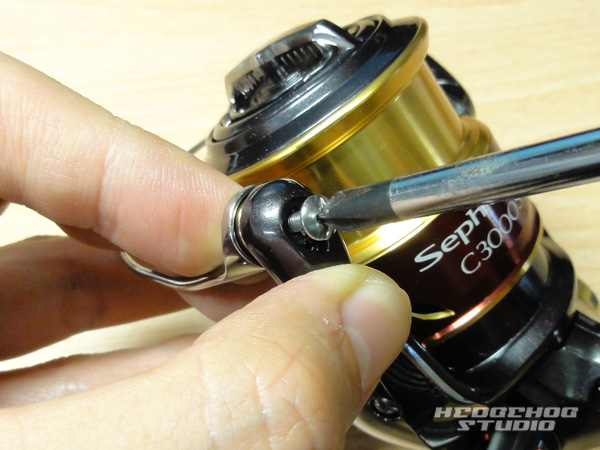
Finally, tighten the screw to secure the assembly. If the line roller rotates properly, the installation is complete.
| Compatible Models
- 11 TWIN POWER
(1000S, 1000PGS, C2000S, C2000HGS, 2000S, 2500, 2500S, C3000, C3000SDH,
C3000HG, 4000, 4000XG)
- 13 Vanquish Limited Edition
(C2000HGS, 2500HGS, C3000HGSDH, 4000XG)
- 12 Vanquish
(1000S, C2000S, C2000HGS, 2000S, C2500HGS, 2500S, 2500HGS, C3000, C3000HG,
C3000SDH, 4000, 4000XG)
- 13-14-15 AR-C AERO CI4+
(C3000HG, 4000, 4000XG, 5000XG)
- 14-15 AR-C AERO BB
(C3000HG, 4000, 4000HG, 5000HG)
- 13 SoaRe CI4+
(C2000PGSS, 2000HGS)
- 13 SoaRe BB
(C2000PGSS, 2000HGS)
- 15 EXSENCE LB
(C2000MDH)
- 14 EXSENCE BB
(C3000M, C3000HGM, 4000HGM)
- 12 EXSENCE CI4+
(C3000M, C3000HGM, 4000S, 4000XGS)
- 11 EXSENCE BB
(C3000M, C3000HGM, 4000S, 4000HGS)
- 15 Sephia SS
(C3000S, C3000HGS, C3000SDH, C3000HGSDH)
- 13 Sephia BB
(C3000S, C3000HGS, C3000SDH, C3000HGSDH)
- 12 Sephia CI4+
(C3000S, C3000HGS, C3000SDH, C3000HGSDH)
- 12 CARDIFF CI4+
(C2000SS, C2000HGS)
- 12 ULTEGRA
(1000, 1000S, C2000S, C2000HGS, 2500, 2500S, C3000HG, C3000SDH, 4000HG)
- 13 COMPLEX CI4+
(2500S F4, 2500S F6, 2500HGS F4, 2500HGS F6)
- 12 COMPLEX BB
(2500HGS F4, 2500HGS F6, 2500S F4, 2500S F6)
- 12 RARENIUM CI4+
(1000S, C2000S, C2000HGS, 2500, 2500S, C3000, C3000HG, 4000XG)
- 13 NASCI
(1000S, C2000, C2000HGS, 2500, 2500S, C3000, C3000HG, C3000SDH, 4000HG,
C5000)
- 13 BIOMASTER SW
(4000XG, 4000HG, 5000XG, 5000PG)
*Not compatible with 8000HG, 8000PG and 10000HG.
- 11 BIOMASTER
(1000S, C2000S, C2000HGS, 2000S, 2500, 2500S, C3000, C3000SDH, C3000HG,
4000, 4000HG, C5000)
*Not compatible with 6000 and 8000.
- 10 BIOMASTER SW
(4000PG, 4000XG)
*Not compatible with 6000HG, 6000PG, 8000HG and 8000PG.
- 14 BB-X HYPER FORCE
(1700DHG, 1700DXG, C2000DHG, C2000DXG)
- 15 BB-X Rinkai SP
(1700DXG)